How To Install the Emporium Security System
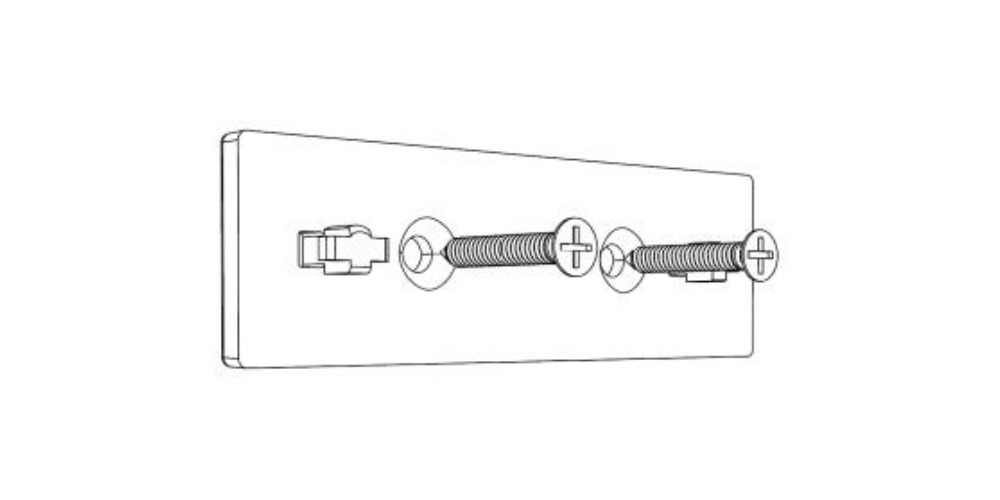
1. Install the hanging plate onto the wall.
Fix the hanging plate to the wall where you want your security panel using the screws and a screwdriver. Be sure to fix the plate in a horizontal position.
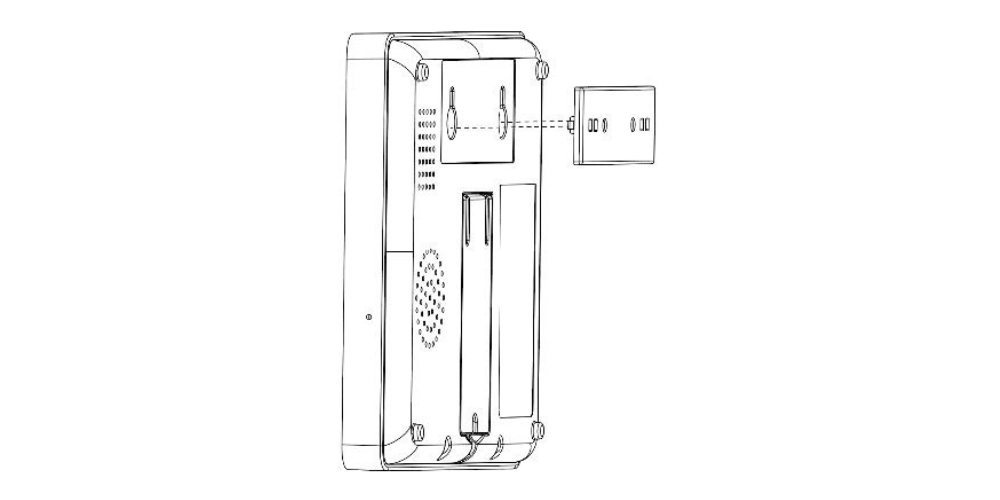
2. Attach your security panel to the hanging plate.
Attach your security panel to the hanging plate by aligning the holes in the back of the security panel to the two screws on the hanging plate.
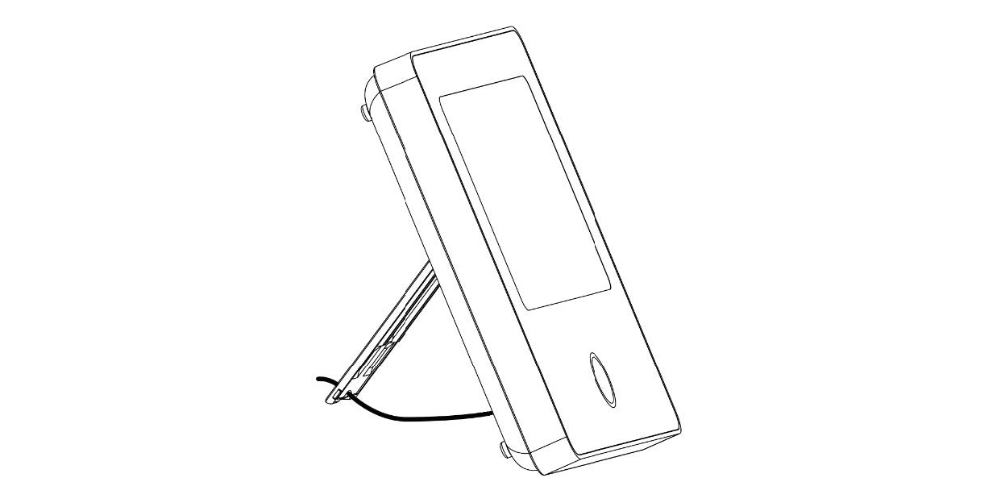
If you prefer to not fix your security panel to the wall, you can simply use the stand on the back to stand the device upright on a flat surface.
3. Connect the Entry Sensors to the Security Panel
On the Security Panel, click Menu → Accessories, then enter your user code. The default code is 1234.
Press Sensor → "+" Symbol → Entry, then set the Mode, Delay, and Advanced Settings.
Press + Pair, then trigger the entry sensor by separating the two parts. You'll see a "Paired Successfully" message. You can rename your sensors on the Tuya App.
Repeat these steps for all your entry sensors.
4. Install your Entry Sensors
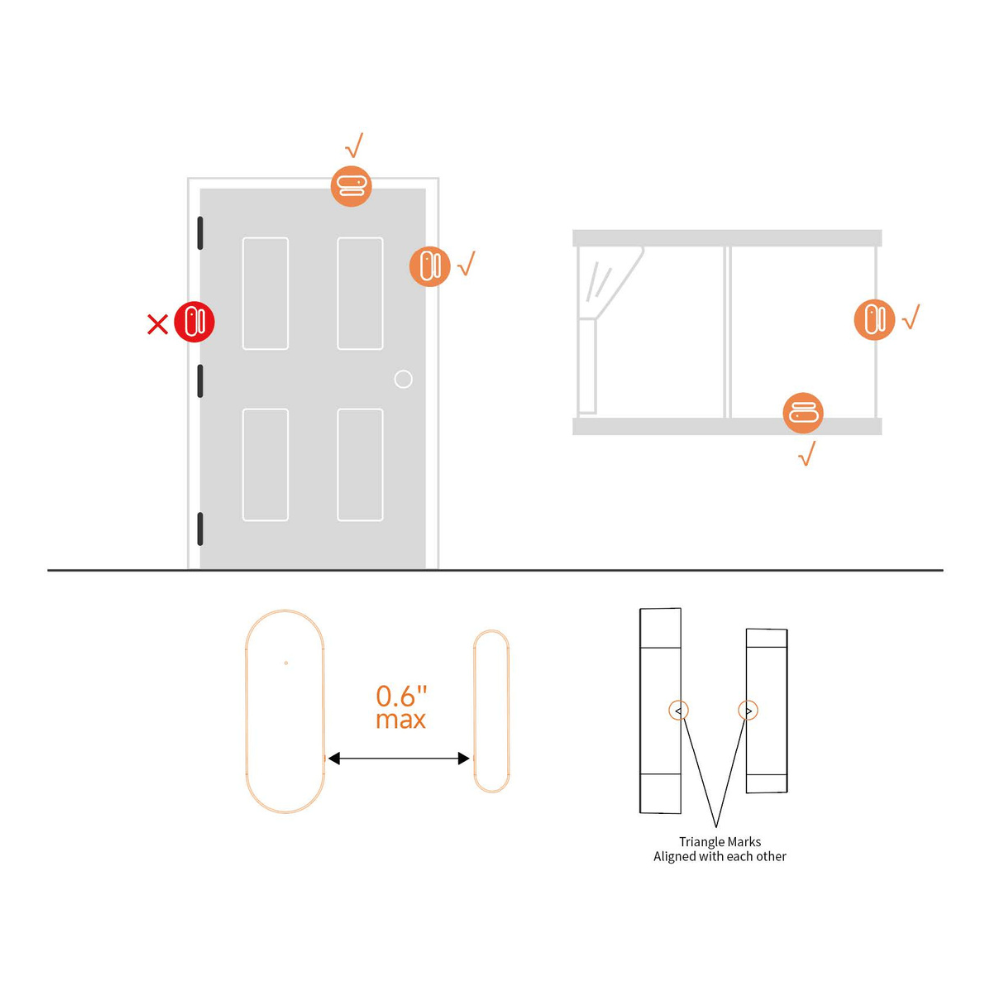
Entry Sensors should be installed on any door or window you wish to arm.
First, wipe the area on the door or window clean and apply double-sided tape to the bottom.
The door sensor transmitter is the larger part and the door sensor magnet is the small part. Install each part separately.
The triangle marks on the transmitter and the magnet should be facing each other,
The distance between the two should sit no more than 1.5cm or 0.6” away from each other.
5. Connect the Motion Sensors to the Security Panel
On the Security Panel, click Menu → Accessories, then enter your user code. The default code is 1234.
Press Sensor → "+" Symbol → Entry, then set the Mode, Delay, and Advanced Settings.
Press + Pair, then trigger the motion sensor by waving your hand in front of it until the motion light turns on. You'll see a "Paired Successfully" message. You can rename your sensors on the Tuya App.
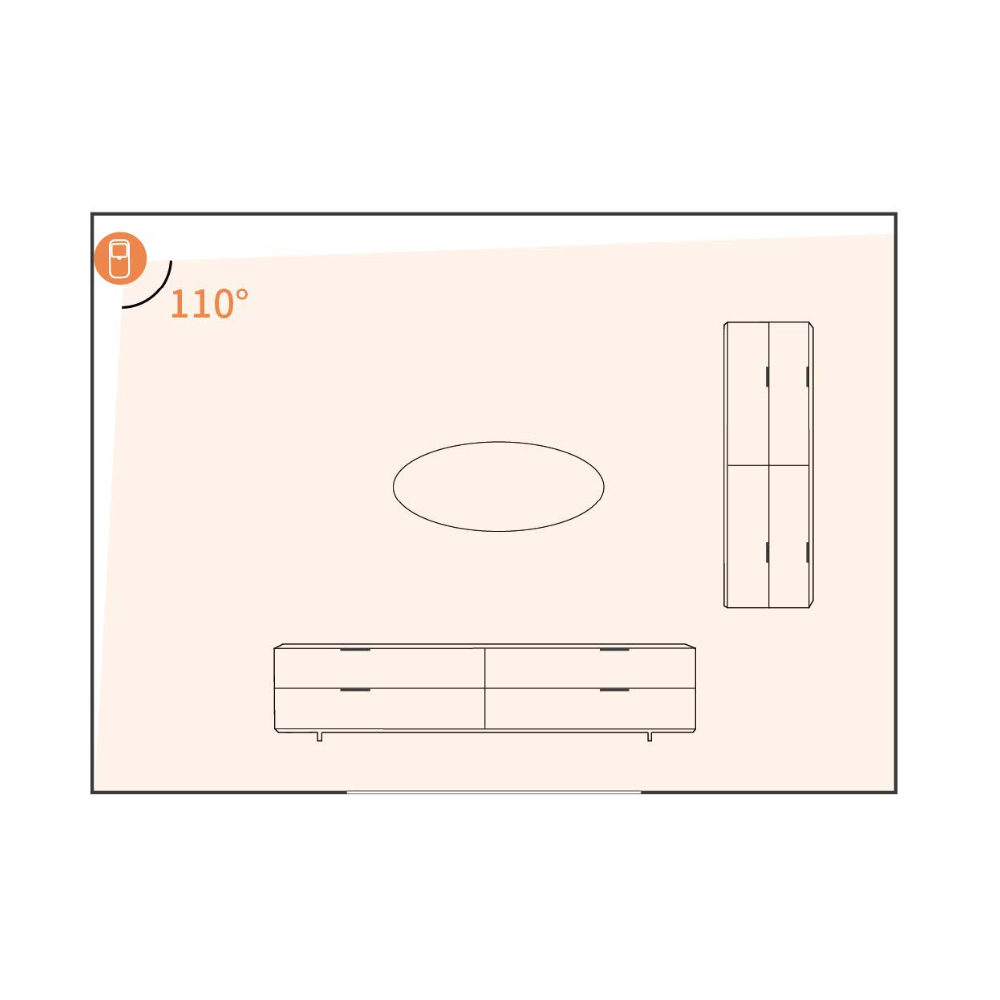
6. Install your Motion Sensor
The recommended installation height is 79”- 87” (2.0~2.2m) above the ground.
Install the motion sensor in a corner or on a flat wall, with no obstacles or blind spots.
It should not be directly facing the cold and hot vents, sources, etc.
To avoid false alarms, make sure it's positioned so that it does not pick up the motion of your pets.
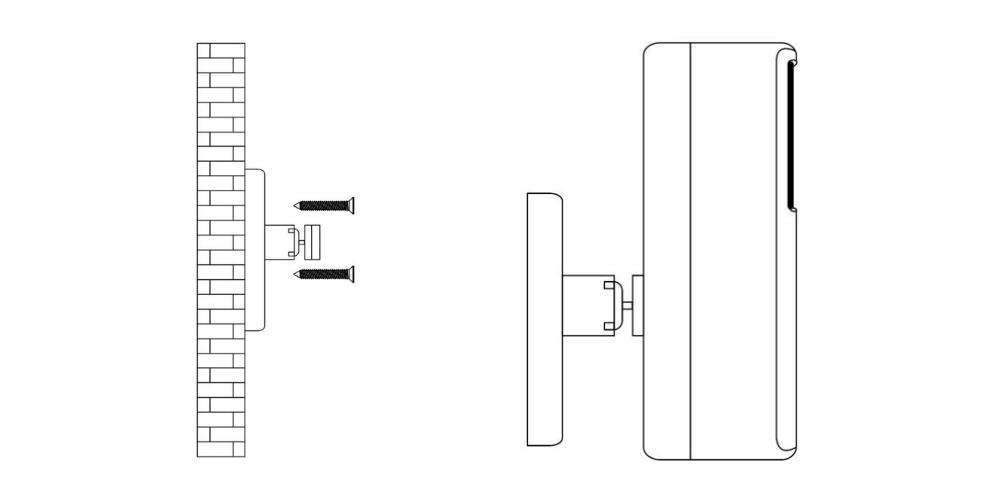
Simply screw the base to the wall, then hang the motion sensor on the rotating shaft.
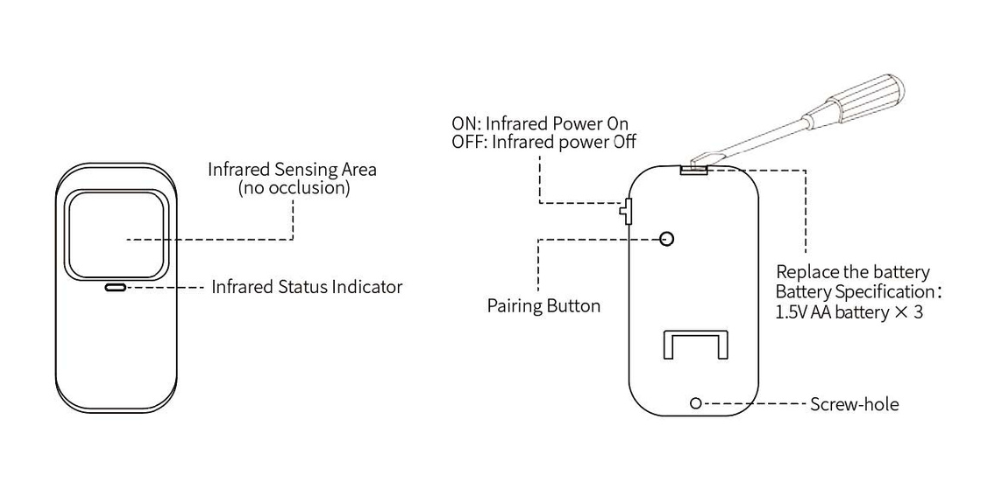
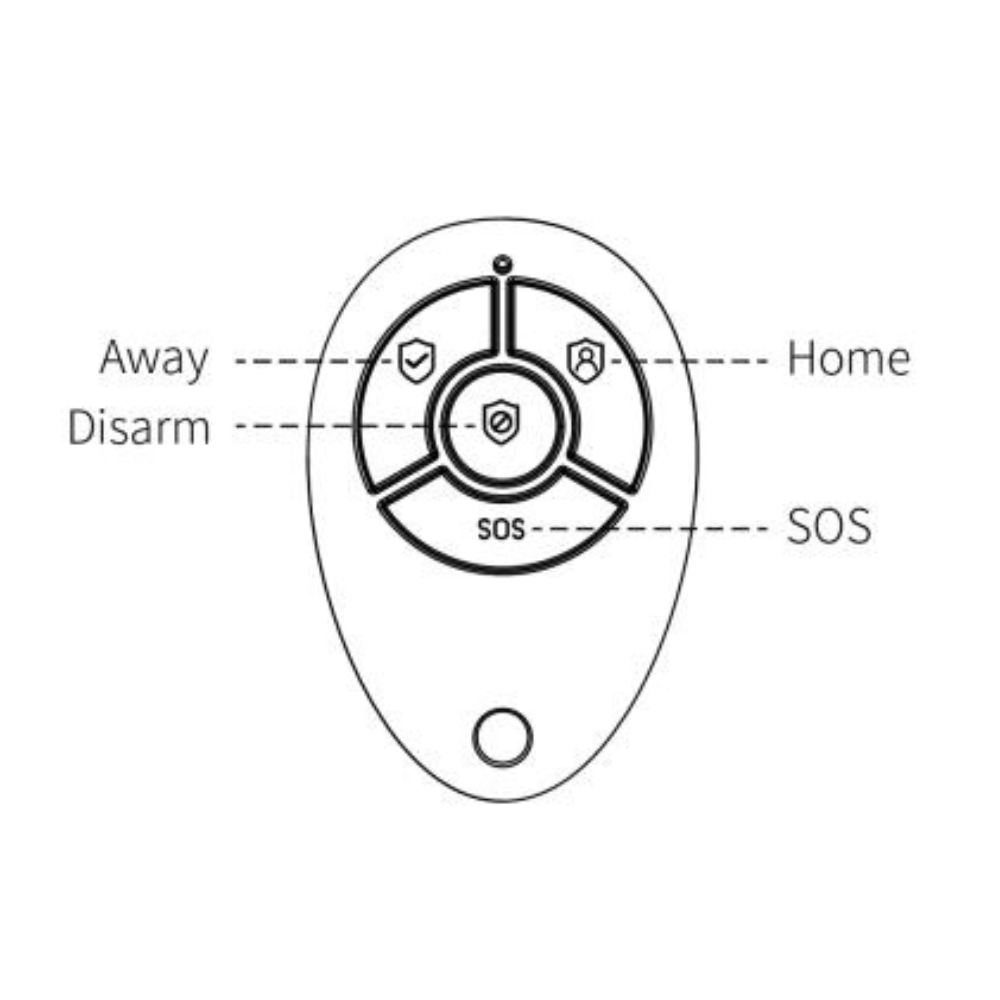
7. Connect the Controller to the Security Panel
On the Security Panel, click Menu → Accessories, then enter your user code. The default code is 1234.
Press Controller.
Press "+" Symbol, then trigger the controller by pressing any key on it.
You'll see a "Paired Successfully" message. You can rename your controller on the Tuya App.
8. Connect the Multi-Function Button to the Security Panel
To use it as a doorbell:
On the Security Panel, click Menu → Accessories, then enter your user code. The default code is 1234.
Press Doorbell → "+" Symbol, then trigger the doorbell by pressing the button.
You'll see a "Paired Successfully" message. You can rename your sensors on the Tuya App.
To use it as an SOS button:
On the Security Panel, click Menu → Accessories, then enter your user code. The default code is 1234.
Press Sensor → "+" Symbol → Urgent → Advanced.
Press "+ Pair", then trigger the SOS button by pressing it.
You'll see a "Paired Successfully" message. You can rename your sensors on the Tuya App.
Still Need Help?
Fill out the form below with your questions, and we will get back to you asap!
